Dark mode
Biome
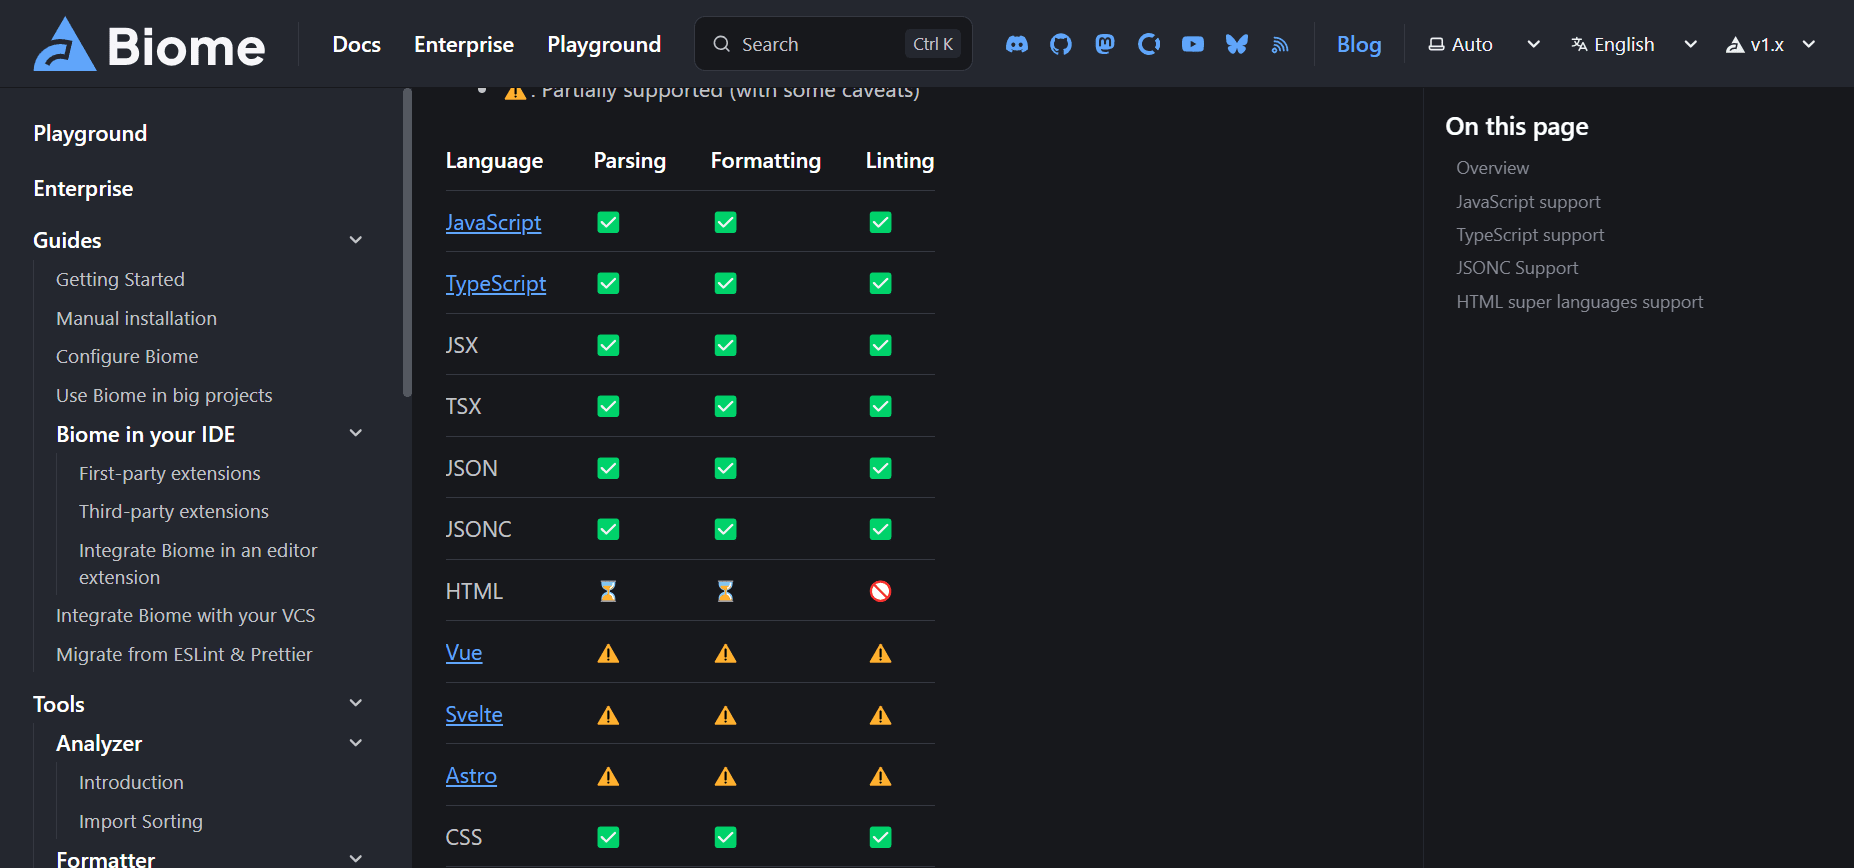
Biome เหมือน Linter + Formatter + parsing ในที่เดียว ใช้ biome ตัวเดียว อาจไม่ต้องเป็นต้องใช้ prettier, eslint
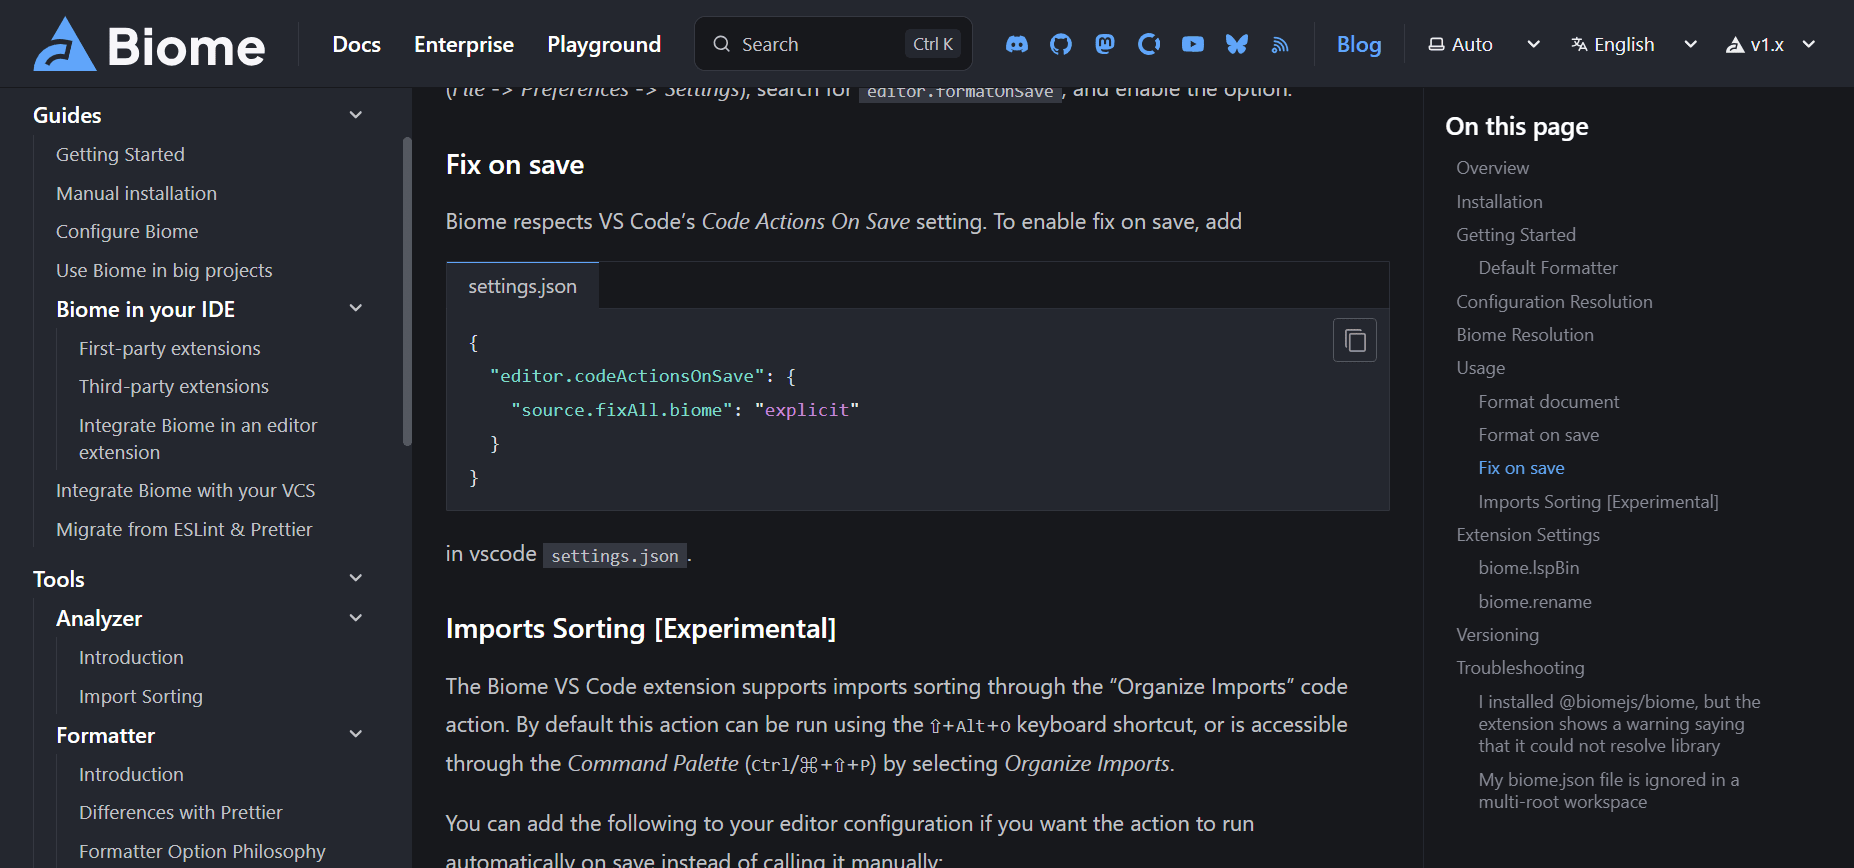
Usage via IDE
ดาวน์โหลด https://marketplace.visualstudio.com/items?itemName=biomejs.biome
ถ้าใช้ผ่าน IDE เมื่อ error มันจะแสดงที่ problem

ตั้งค่าใน IDE ตามเอกสาร
Usage via CLI
ติดตั้ง package
- install biome
bash
npm install biome --save-devbash
bun add -d biomebash
pnpm add -D biomeconfig
เนื่องจากมี schema เราสามารถใช้ ctrl + space ใน IDE เพื่อแสดง options การตั้งค่าได้เลย หรือดูเพิ่มเติมที่
json
{
    {
	"$schema": "https://biomejs.dev/schemas/1.5.3/schema.json",
	"organizeImports": {
		"enabled": true
	},
	"vcs": {
		"clientKind": "git",
		"enabled": true,
		"useIgnoreFile": true
	},
	"formatter": {
		"enabled": true
	},
	"linter": {
		"enabled": true,
		"ignore": [
			"**/node_modules/**",
			"**/.vitepress/cache/**",
			"**/.vitepress/dist/**",
			"**/dist/**",
			"**/*.min.js",
			"**/*.d.ts",
			"**/public/**"
		],
		"rules": {
			"recommended": true,
			"style": {
				"useNodejsImportProtocol": "off"
			},
			"correctness": {
				"noUnusedVariables": "off"
			}
		}
	},
	"files": {
		"ignoreUnknown": true,
		"ignore": [
			"**/node_modules/**",
			"**/.git/**",
			"**/.vitepress/cache/**",
			"**/.vitepress/dist/**",
			"**/dist/**",
			"**/*.min.js",
			"**/public/**",
			"**/package-lock.json",
			"**/yarn.lock",
			"**/pnpm-lock.yaml"
		]
	}
}

}
setup script
json
{
	"scripts": {
		"lint": "biome lint --write .",
		"format": "biome format --write .",
		"check:format": "biome lint",
		"check:lint": "biome lint"
	},
	"devDependencies": {
		"biome": "^1.10.0"
	}
}
run
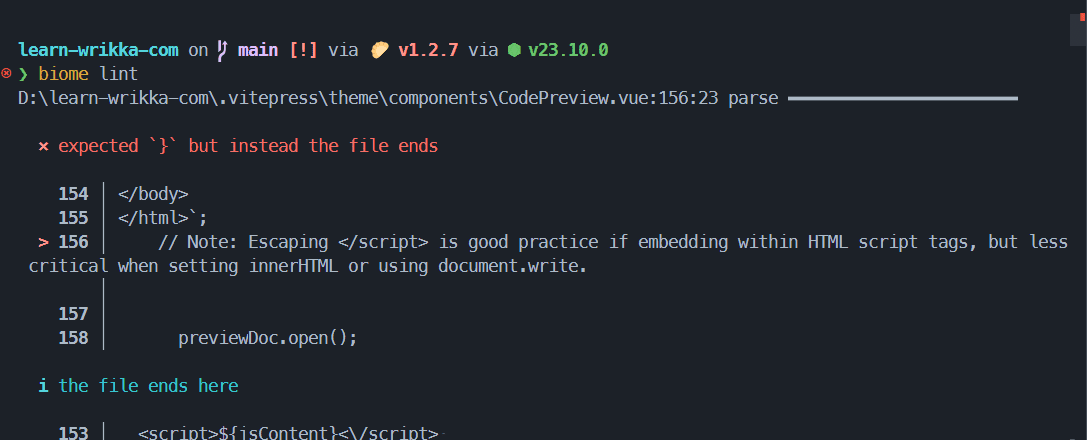
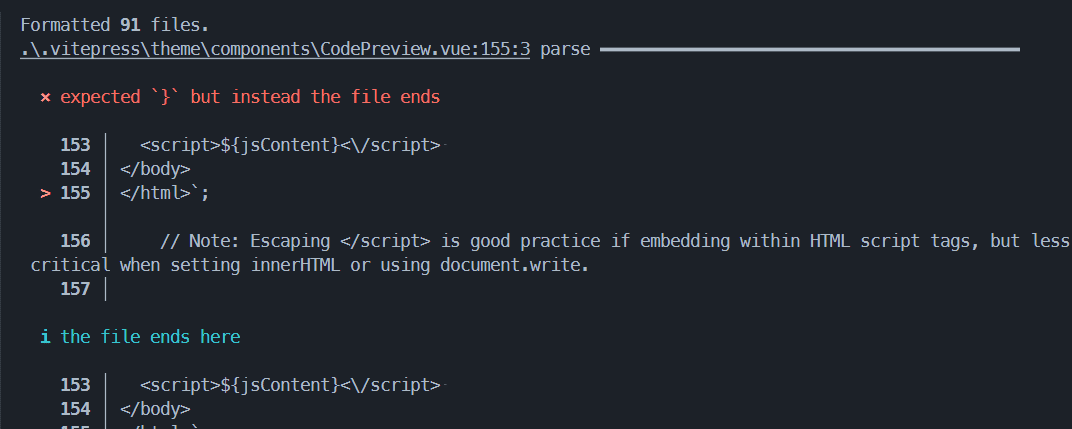
รองรันตามที่กำหนดใน script
bun lint => ตรวจสอบความผิดพลาด
bun format => format code ให้เป็นระเบียบ
Others
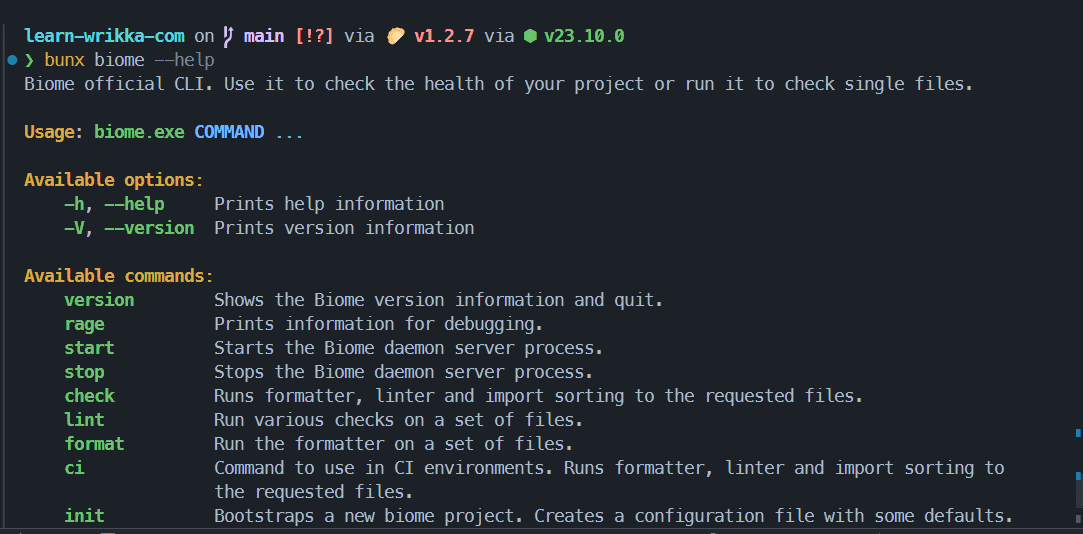
ดู CLI ทั้งหมด
bash
npx biome --helpbash
pnpm dlx biome --helpbash
yarn dlx biome --helpbash
bunx biome --help